How To Clean Washing Machine Filter Top Loader – Easy Guide
To clean your top loader washing machine filter, first unplug the washer and locate the filter inside the agitator or near the drum’s top rim. Remove it carefully, then soak it in hot, soapy water for 10 minutes. Rinse it thoroughly and check for any damage or buildup.
Make sure to reinstall the filter securely to avoid leaks. Cleaning it every three months helps keep your washer running smoothly and prevents clogs.
Keep going to discover detailed tips and troubleshooting advice for ideal filter care. It’s easier than you think once you get the hang of it!
Why Cleaning Your Top Loader Washing Machine Filter Matters
Although it’s easy to overlook, cleaning your top loader washing machine filter is essential for maintaining effective performance. You need to clean the filter regularly to prevent lint buildup, which can cause slow drainage and reduce washing effectiveness.
Neglecting this task leads to water retention in clothes and may encourage mold growth and unpleasant odors. For peak performance, schedule regular cleaning every three months, or monthly if you use the washer heavily.
Ignoring filter cleaning causes damp clothes, mold, and odors; clean regularly for optimal washer performance.
This maintenance reduces lint accumulation on fabrics and prolongs your machine’s lifespan. By keeping the filter clear of trapped debris and moisture, you guarantee effective water flow and thorough rinsing.
Prioritize this step to avoid drainage issues and maintain your washer’s reliability over time. It’s a simple habit that makes a big difference!
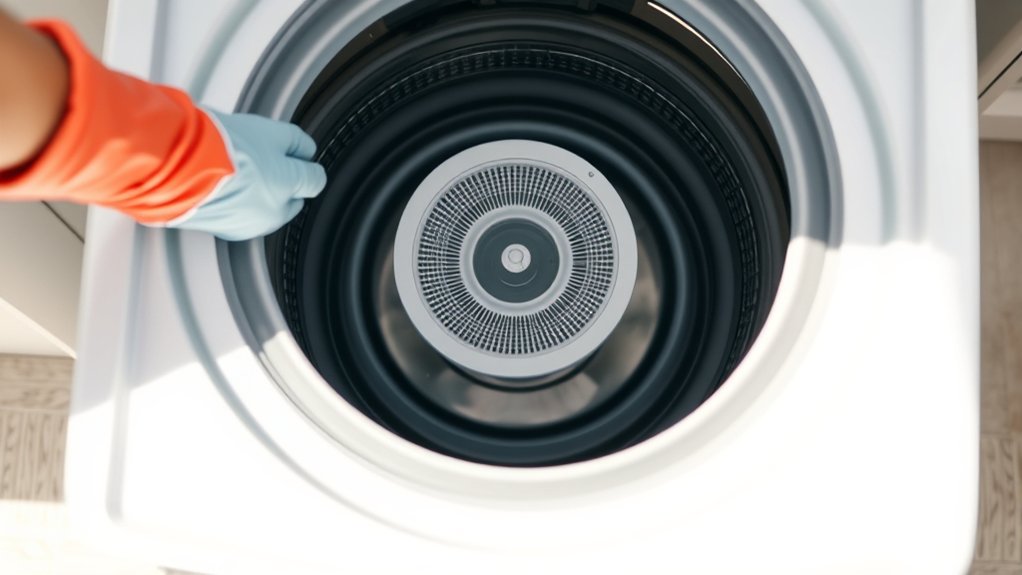
Where to Find the Filter in Your Top Loader Washer
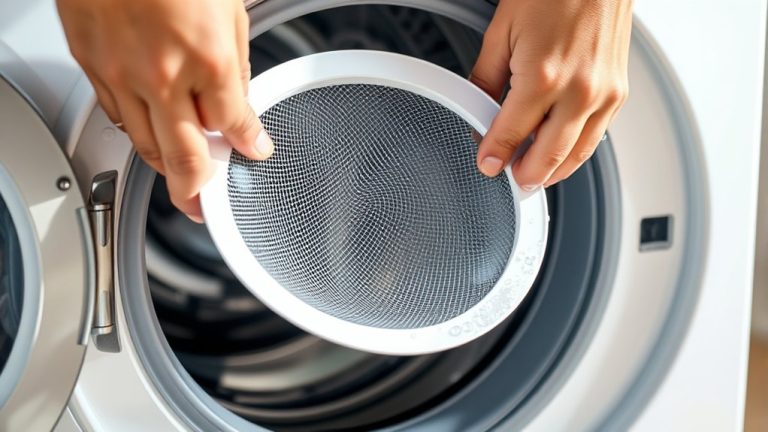
Finding the filter in your top loader washing machine means knowing where to look. Usually, the filter is inside the center agitator or along the drum’s top rim.
To get to the filter inside the agitator, just lift the removable cover, and you’ll see the lint trap. If it’s on the top rim, look for a round or rectangular screen that you can pull out for cleaning.
Keep in mind, newer top-load washers, especially those made after 2001, mightn’t have a filter at all. So, it’s always a good idea to check your owner’s manual for the exact details.
Once you find the filter, you can clean it properly. This helps remove debris and keeps your washer running at its best.
Regular checks prevent clogs and help your machine last longer.
How to Safely Unplug and Prepare Your Washer
Before you start cleaning the filter, make sure you power off the washer completely by pressing the power button, if it has one.
Then, unplug the machine by firmly grasping the cord at the outlet—never pull the cord itself.
It’s a good idea to clear the area around your washer so you have plenty of space to work and to avoid any hazards.
If needed, go ahead and disconnect the water hoses to prevent leaks.
Don’t forget to leave the lid open for a while to let any moisture evaporate.
Power Off Procedure
When preparing to clean your washing machine filter, always unplug the washer from the electrical outlet to eliminate any risk of electric shock.
Begin the power off procedure by firmly grasping the plug and disconnecting it. Never pull by the cord.
If the outlet is difficult to access, switch off the circuit breaker controlling the washer’s power supply to guarantee safety.
Confirm the washer is fully drained, using the emergency drain hose if your model has one.
After unplugging or switching off the breaker, wait a few minutes to allow any residual electrical charge to dissipate.
Keep the area around the washer clear of obstacles to maintain safe movement during preparation.
Following these steps guarantees a safe and effective start to your filter cleaning process.
Unplugging Safety Tips
Although it may seem straightforward, unplugging your washing machine requires careful attention to safety protocols to prevent electric shock. Before any maintenance, make sure the machine is turned off.
Locate the power cord and grasp the plug firmly, pulling it straight from the electrical outlet without touching any wet surfaces. Keep your hands dry throughout the process to stay safe.
If the plug is hard to reach, just switch off the circuit breaker supplying power to the washer instead. Avoid using tools that might damage the cord.
After unplugging, wait a few minutes to let any residual power dissipate before starting filter cleaning. Following these unplugging safety tips helps ensure you prepare your washer correctly and protect yourself during maintenance tasks.
Preparing Workspace Area
Two essential steps will prepare your workspace for safely cleaning the washing machine filter. First, verify the washer is unplugged to eliminate electrical risks. Second, clear the drum of any laundry to avoid obstruction.
When preparing the workspace area, follow these steps:
- Place towels or a shallow container near the filter area to catch any water spillage.
- Position the washer in a well-ventilated space to reduce exposure to odors released during cleaning.
- Gather necessary tools, such as a screwdriver and soft brush, ready for efficient filter removal and cleaning.
This setup minimizes hazards and streamlines the cleaning process. It helps ensure safety and makes the job easier.
Tools and Supplies to Clean Your Top Loader Filter
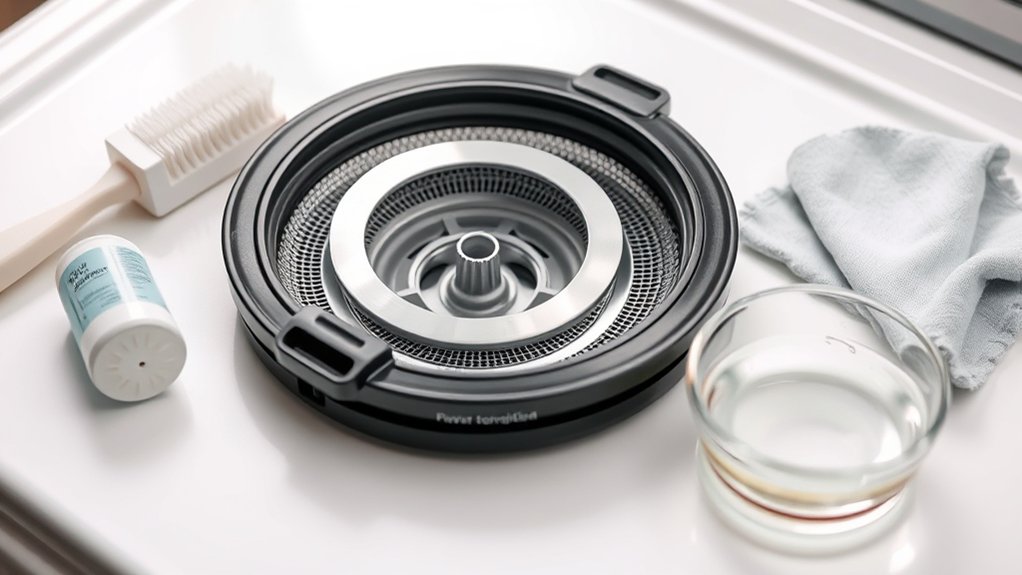
A few essential tools and supplies will make cleaning your top loader washing machine filter efficient and effective.
Start by preparing a bucket or container to catch any water spills during the process. You’ll need a soft brush or cloth to scrub the filter thoroughly and a bowl of hot, soapy water to soak removable filter components.
Gloves protect your hands from grime, and a flashlight helps illuminate hard-to-see areas inside the filter housing.
Keep a towel nearby to wipe up any excess water once you remove the filter.
Finally, consult your washing machine’s manual to identify any model-specific tools or cleaning requirements.
Having these tools and supplies ready guarantees a smooth, precise cleaning process without unnecessary interruptions.
How to Remove Your Top Loader Filter
First, find where the filter is located—it’s usually either inside the center agitator or along the top rim of the drum.
You might need a screwdriver or another tool depending on your model, so have those ready just in case.
Before you start, make sure to turn off and unplug the washing machine. This step is really important for your safety.
Once everything’s set, carefully pull out the filter.
Filter Location Identification
When you need to clean your top loader’s filter, start by checking the center agitator for a removable cover that hides the lint trap.
Or, you can inspect the top rim of the drum for a round or rectangular screen. Proper filter location identification is vital for efficient maintenance.
Follow these steps:
- Examine the center agitator for removable filters by gently lifting or unscrewing the cover.
- Inspect the top rim of the drum carefully for a screen that can be accessed without force.
- Consult your owner’s manual if you don’t find a traditional filter, as some models vary in design.
Always handle components with care to avoid damage.
Being precise about the filter’s location helps prevent unnecessary disassembly. Plus, it guarantees you maintain your washer effectively.
Tools For Removal
Two essential tools you’ll need to remove your top loader filter are a pair of gloves and a towel to handle any residual water.
Before starting, unplug the washer and drain any leftover water to avoid spills.
Locate the washer filters by consulting your owner’s manual for specific details, as the filter is often inside the agitator or beneath a removal cover on the drum’s top rim.
Use your gloves to carefully twist or pull off the removal cover without damaging it.
Firmly grip the filter to pull it out; some models might require unscrewing.
Remember, washer filters should be cleaned at least every few months to maintain efficiency.
Having these tools ready guarantees a smooth, damage-free removal process.
Safe Filter Extraction
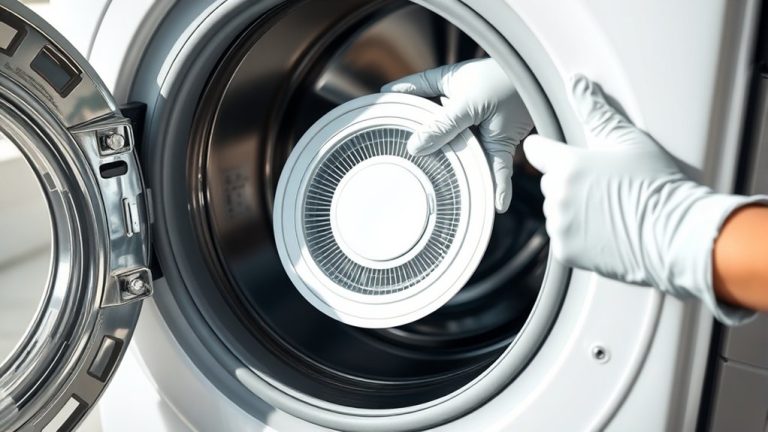
After gathering your gloves and towel and confirming the washer is unplugged with all water drained, focus on locating the filter.
The filter extraction process for your top-load washing machine requires precision to avoid damage.
First, consult the user manual to identify the filter’s exact location. It could be inside the center agitator or along the drum’s top rim.
If it’s inside the agitator, gently remove the cover to expose the filter. For rim filters, look for a circular or rectangular screen.
Carefully pull out the filter, avoiding force. Inspect and clean any debris that might be obstructing its function.
Once cleaned, securely reinstall the filter. Make sure it clicks firmly to prevent leaks or operational issues during washing cycles.
This method guarantees safe, effective filter extraction and maintenance.
How to Clean and Inspect Your Top Loader Filter
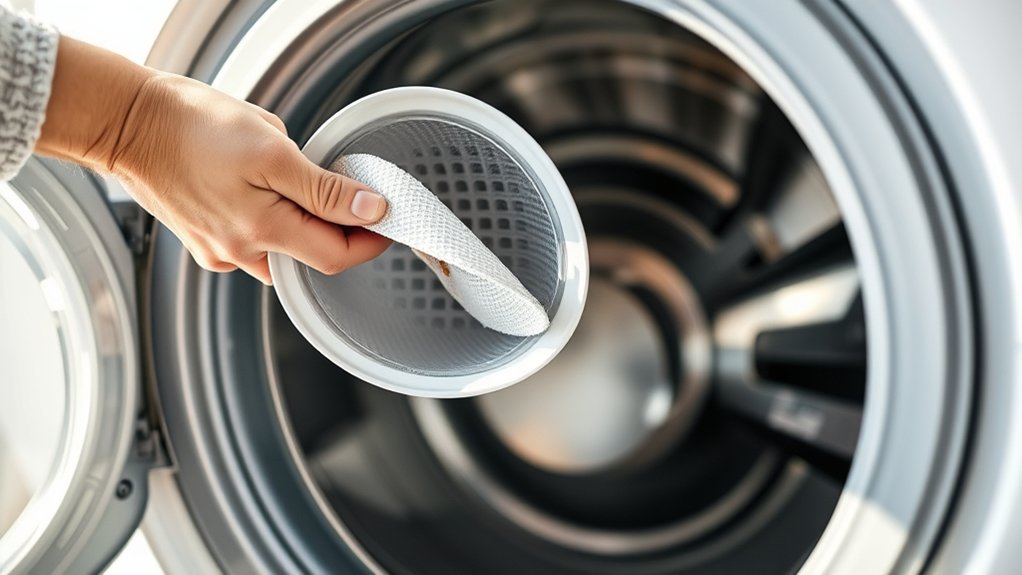
To clean and inspect your top loader filter, start by locating it inside the center agitator or along the top rim of the drum. It might be hidden under a removable cover or screen. Make sure to unplug the machine before you begin.
Next, drain any residual water using the emergency hose to avoid spills. Carefully remove the filter and soak it in hot, soapy water for 10 minutes. After soaking, rinse it thoroughly under warm water.
Take a good look at the filter to check for any damage and make sure it’s free from lint and buildup. Once it’s clean and inspected, reinstall the filter securely. Finally, run an empty hot water cycle to keep your machine running at its best.
| Step | Action |
|---|---|
| Locate Filter | Center agitator or drum rim |
| Drain Water | Use emergency drain hose |
| Clean Filter | Soak, then rinse |
| Inspect | Check damage and debris removal |
Fixing a Damaged or Clogged Filter
If your washing machine isn’t draining properly or clothes stay wet after a cycle, a clogged or damaged filter is often the culprit. To fix this, follow these steps:
First, unplug the machine and locate the filter. It’s usually inside the center agitator or along the top rim.
Next, remove the filter and check for debris. Use a soft brush or cloth to clean off any buildup. If needed, soak the filter in hot, soapy water for a thorough clean.
If the filter is damaged, replace it by following your owner’s manual instructions. This will help ensure you get the right part.
Regular filter maintenance prevents clogging and improves drainage. It also reduces the risk of mold.
Recommended Cleaning Frequency for Your Top Loader Filter
You should clean your top loader filter at least every three months to keep it running smoothly and avoid clogs.
If you often deal with heavy laundry loads, it’s a good idea to clean it every month to cut down on lint buildup.
Also, be sure to check your owner’s manual because some newer models might need less frequent cleaning or mightn’t have a filter at all.
Cleaning Interval Guidelines
Cleaning your top loader washing machine filter every three months guarantees peak performance and prevents clogging. Adhering to cleaning interval guidelines guarantees your machine operates efficiently.
Follow these steps for ideal maintenance:
- Inspect and clean the filter every three months under normal use to avoid lint buildup and drainage issues.
- For heavy laundry users or those in humid or hard water environments, increase cleaning frequency to monthly to prevent mineral deposits and odors.
- Always consult your owner’s manual first, as some top loader models, especially those made after 2001, may not have a filter or require different maintenance routines.
Regularly sticking to these guidelines helps prolong filter life and keeps drainage working properly. It also prevents malfunctions caused by debris buildup.
Keeping up with maintenance is easier than dealing with problems later on!
Factors Affecting Frequency
Although general guidelines suggest cleaning your top loader filter every three to six months, several factors influence the ideal frequency for your specific machine.
You should adjust the cleaning frequency based on your washer type, load soil level, and water conditions. Heavily soiled loads and hard water increase buildup, which means you’ll need to clean the filter more often. It’s a good idea to regularly inspect your filter to avoid any performance issues.
| Washer Type | Load Condition | Recommended Cleaning Frequency |
|---|---|---|
| Center Agitator | Normal Loads | Every 6 months |
| Bottom Agitator (HE) | Heavily Soiled Loads | Every 3 months |
| Any Type | Hard Water / Humid Env | Monthly |
Just follow these guidelines to keep your filter working at its best and prevent clogs.
Maintenance Tips to Keep Your Top Loader Filter Cleaner Longer
Since lint buildup and residue can quickly impair your top loader’s performance, maintaining a clean filter is essential. To keep your lint filter cleaner longer, follow these maintenance tips:
First, regularly inspect the lint filter every three months. If you have heavy laundry loads or hard water, check it monthly to remove debris and look for any damage.
Inspect your lint filter every three months, or monthly with heavy use or hard water, to ensure optimal performance.
Next, use the appropriate amount of detergent. Too much detergent leaves excess residue that clogs the filter and reduces efficiency.
Finally, after each wash, leave the lid open to let the drum dry completely. This helps prevent mildew and odors that can harm the filter’s condition.
Troubleshooting Common Top Loader Filter Issues
One of the most common issues you’ll encounter with a top loader filter is slow drainage caused by lint buildup.
To troubleshoot, first inspect the filter for clogs or debris. A dirty filter often results in clothes staying soaking wet after cycles, signaling the need for immediate cleaning.
Regularly check and clean the filter every three months, or monthly if you do heavy laundry.
After cleaning, make sure the filter is securely reinstalled to avoid further drainage problems.
If slow drainage persists despite thorough cleaning and correct reinstallation, check your washing machine’s manual for specific troubleshooting steps.
When problems continue, it’s best to seek professional repair services to prevent damage and keep your machine running smoothly.
Frequently Asked Questions
Can I Use Vinegar to Clean the Washing Machine Filter?
Yes, you can use vinegar to clean your washing machine filter effectively.
Vinegar breaks down mineral deposits and eliminates odors, making it a reliable option for filter maintenance.
For best results, soak the filter in a vinegar-water solution for about 10 minutes, then rinse it thoroughly.
Cleaning frequency depends on how often you use the machine, but monthly checks are usually a good idea.
If you prefer, alternative cleaners like baking soda or commercial filter cleaners also work well.
Just pick what feels easiest for you!
Will Cleaning the Filter Improve Washing Machine Efficiency?
Just like a well-tuned engine runs smoother, cleaning your washing machine filter directly boosts its efficiency.
By following filter maintenance tips and addressing common filter issues like lint buildup and clogs, you’ll enhance washing machine performance.
Stick to cleaning frequency recommendations, typically every one to three months, to guarantee ideal drainage and reduce energy waste.
Regular filter care prevents costly repairs and keeps your machine working at peak capacity. It’s a simple step that really pays off!
How Long Does It Take to Clean a Top Loader Filter?
Cleaning a top loader filter typically takes 15 to 30 minutes, including removal, soaking, and rinsing.
A good tip is to soak the filter in hot, soapy water for about 10 minutes. This helps tackle common filter problems like lint buildup.
It’s important to stick to cleaning frequency recommendations, which are every three months or monthly if you use the washer a lot. This helps keep your washing machine in good shape and prevents clogs.
Doing regular maintenance saves you time in the long run and keeps your machine running smoothly.
Can a Dirty Filter Cause Bad Odors in My Washer?
Absolutely, a dirty filter can turn your washer into a stinky swamp! Neglecting filter maintenance traps lint and debris, causing stagnant water buildup that breeds mold and foul odors.
For effective odor prevention and washer hygiene, clean your filter every three months. This cleaning frequency guarantees proper drainage and airflow, preventing bacteria growth.
Regularly maintaining your filter optimizes your washer’s performance and keeps your laundry fresh and odor-free.
It’s a simple step that makes a big difference!
Is It Safe to Clean the Filter Without Unplugging the Machine?
No, it’s not safe to clean the filter without unplugging the machine. Always follow safety precautions to prevent electric shock or accidental activation.
For effective filter maintenance, unplug the washer before cleaning.
Try to clean the filter every 1-3 months depending on how often you use the machine. If your filter is damaged or clogged beyond cleaning, you might want to consider replacing it.
And don’t forget to check your owner’s manual for specific instructions. That way, you’ll keep everything safe and running smoothly.
Conclusion
Cleaning your top loader washing machine filter regularly guarantees efficient performance and prevents costly repairs. You’ve learned where to find the filter, how to safely remove it, and the tools needed for thorough cleaning.
So, why risk damage or poor washing results by neglecting this simple task? Stick to the recommended cleaning schedule and maintenance tips to keep your washer running smoothly and your clothes spotless every time.