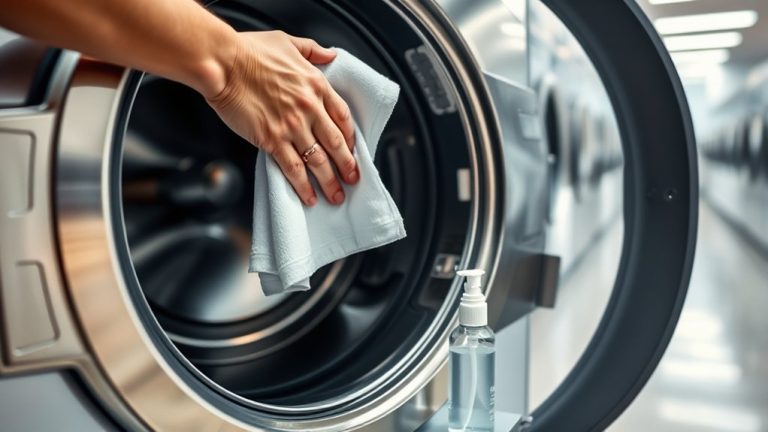
How To Clean Washing Machine Drain Trap – Guide
You’ll find your washing machine’s drain trap behind a bottom front panel or near the drain hose. First, unplug the machine and place towels underneath. Carefully remove the trap, then clear debris and rinse it with warm water.
Make sure to inspect for damage before reinstalling it. It’s a good idea to clean the trap regularly every few months to prevent clogs, odors, and vibrations.
If problems persist or you see error codes, professional help may be needed. Keep following to understand detailed steps and tips.
Where to Find the Washing Machine Drain Trap
Although the exact location varies by brand and model, you can typically find the washing machine drain trap at the bottom front of front-loading machines, often behind a small access panel.
The washing machine drain trap is usually located at the bottom front, often behind a small access panel.
In top-loading models, you’ll usually locate the drain trap by removing the drain hose or accessing a panel at the machine’s base. Many modern washers feature a removable door or panel specifically designed to provide direct access to the trap.
Because the position differs across brands, it’s best to consult your user manual for precise details. Regularly inspecting this trap is essential to prevent clogs and maintain efficient drainage.
Knowing the exact location allows you to perform routine checks and guarantees your washing machine operates smoothly without drainage issues. Just like maintaining consistent espresso extraction requires balancing key variables, regular maintenance of your washing machine’s drain trap ensures optimal performance.
Removing the Washing Machine Drain Trap
Once you’ve located the washing machine drain trap, the next step is to remove it safely for cleaning. First, turn off and unplug the washing machine to avoid electrical hazards.
Position towels or a shallow pan underneath the trap to catch any residual water.
Depending on your model, open the small panel at the washer’s base or access the drain hose. Carefully unscrew or unsnap the drain trap, following the manufacturer’s instructions.
Try not to use too much force to avoid damage.
Gently pull the trap out, making sure you keep control to minimize spills.
Keep all parts organized so reassembly is easy.
Removing the drain trap properly sets you up for effective cleaning and inspection, which you’ll tackle next.
Consistent and careful handling during removal is key to maintaining equipment maintenance and ensuring long-term performance.
Cleaning and Inspecting the Drain Trap
First, find the drain trap—it’s usually behind the access panel or close to the drain hose. Before you do anything, make sure to unplug the machine for safety.
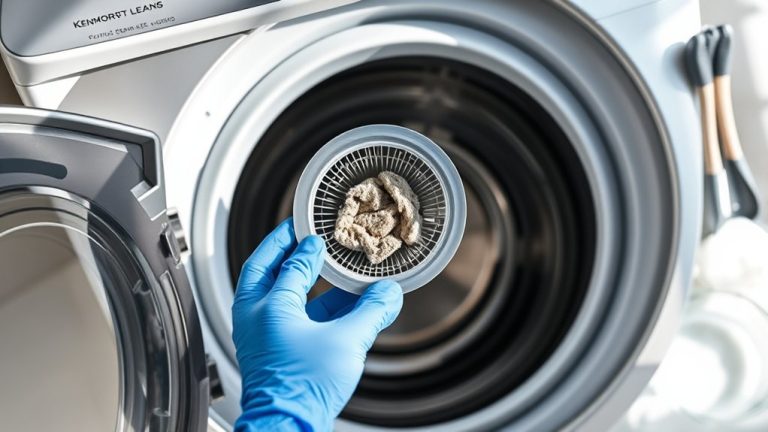
Once you’ve located it, carefully remove the trap. Take some time to clear out any lint, debris, or foreign objects that might be stuck inside.
After that, give the trap a good rinse with warm water to get it nice and clean.
Before putting it back, take a moment to check for any damage. This helps ensure everything works properly and can prevent future clogs.
Then, go ahead and reinstall the trap securely.
Regular maintenance with precise equipment calibration can help avoid unexpected drainage issues and improve washing machine performance.
Locating The Drain Trap
When you need to clean or inspect the drain trap, start by identifying its exact position on your washing machine. Typically, it’s located at the bottom front of the appliance, concealed behind a small access panel or door.
For front-load washers, look for a removable panel at the machine’s base that grants direct access.
In top-load washers, you may need to disconnect the drain hose or find a panel near the bottom to reach the trap.
The drain trap’s purpose is to catch lint, debris, and small objects, preventing plumbing clogs.
To guarantee accuracy, always consult your washer’s owner’s manual or reputable online guides tailored to your model.
Locating the trap correctly is essential before proceeding to clean or inspect it. It’s a small step that can save you a lot of trouble later on.
Maintaining consistency in your cleaning routine ensures optimal performance and prevents unexpected drainage issues.
Removing And Cleaning
After identifying the drain trap’s position, the next step is to make certain your washing machine is turned off and unplugged to avoid any electrical hazards.
Locate the drain trap. It’s on the front bottom panel for front-loaders or along the drain hose for top-loaders.
Place a towel or shallow pan underneath to catch water before carefully unscrewing or pulling out the trap.
Remove all debris, lint, and small objects by hand or with a brush.
Rinse the trap thoroughly with warm water to clear any leftover buildup.
Once cleaned, reinstall the drain trap securely. Make sure it’s tightly fitted to prevent leaks or drainage problems.
Double-check the fit before plugging the machine back in and resuming use.
Maintaining a consistent temperature range during operation can help prevent buildup and extend your machine’s lifespan.
Preventing Future Clogs
Inspecting and cleaning your washing machine drain trap every three to six months helps prevent debris buildup and guarantees efficient drainage. Carefully remove the trap, clear lint, hair, and small objects, then rinse with warm water.
Always check for damage or corrosion during inspection. Replace the trap if necessary. To further reduce clogs, use a fine mesh lint filter over the drain hose.
Establish a routine maintenance schedule to keep the drain trap obstruction-free. This ensures peak performance and extends your appliance’s lifespan. Adjusting maintenance frequency based on usage and environmental factors can optimize equipment performance.
| Task | Frequency | Tools Needed |
|---|---|---|
| Inspect drain trap | Every 3-6 months | Flashlight, gloves |
| Remove debris | During inspection | Small brush |
| Rinse trap | After cleaning | Warm water |
| Check for damage | Every inspection | Visual inspection |
| Install lint filter | As needed | Fine mesh filter |
Signs Your Washing Machine Drain Trap Is Clogged
You’ll probably notice slow or no drainage when the drain trap is clogged, which causes water to back up in the washer. It’s pretty frustrating when that happens.
Sometimes, you might feel unusual vibrations during the spin cycle. That’s often a sign that the drainage isn’t working right because of a blockage.
On top of that, if you catch a foul or musty smell, it usually means there’s debris buildup inside the drain trap that needs to be dealt with as soon as possible.
Maintaining proper flow control is essential to prevent blockages and ensure smooth drainage performance.
Slow Or No Drainage
How can you tell if your washing machine’s drain trap is clogged? Slow or no drainage during the wash cycle is a primary indicator. You might notice water backing up into the drum or even overflowing from the drain hose.
Plus, foul odors often come from debris and mold buildup trapped inside the drain trap. It’s also a good idea to check for error codes related to drainage since these often signal an obstruction that’s restricting water flow.
You might see reduced spinning efficiency too because the trapped water prevents proper removal. Just a heads-up though, excessive vibration usually points to a different issue.
To be sure there’s a clog, take a look at the drain trap and hose for blockages. Clean them out as needed to get your drainage back to normal and avoid water backup or damage.
Unusual Washer Vibrations
When your washing machine vibrates unusually during the spin cycle, it often signals a clogged drain trap disrupting water drainage. Debris buildup in the drain trap impedes proper water flow, causing water to accumulate unevenly inside the drum.
This uneven weight distribution leads to excessive vibrations and movement during operation.
If you notice persistent shaking after loading your washer, inspect the drain trap for blockages. Clearing the trap removes obstructions, restoring balanced drainage and reducing abnormal vibrations.
To address this, first disconnect the machine from power, then access and remove the drain trap cover. Clean out lint, coins, and debris thoroughly before reassembling.
Regular maintenance of the drain trap prevents vibration issues and supports ideal washer performance.
Foul Or Musty Odors
If your washing machine emits foul or musty odors after cycles, the drain trap likely harbors mold, mildew, or trapped debris. These odors indicate the drain trap isn’t draining properly, allowing stagnant water to accumulate and create a breeding ground for bacteria.
Over time, lint, soap scum, and organic material build up in the trap, worsening the smell. This buildup causes water to back up, releasing unpleasant odors from your machine.
To eliminate these smells, you need to regularly clean the drain trap, removing all debris and moisture that promote microbial growth. Consistent maintenance guarantees proper drainage, prevents odor formation, and maintains washer efficiency.
Ignoring this issue can lead to persistent bad smells and potential drainage problems. So, it’s a good idea to keep an eye on your drain trap and clean it out regularly to keep things smelling fresh.
How to Prevent Drain Trap Clogs
To prevent drain trap clogs, you should clean the drain trap or hose weekly to remove debris buildup. Employ a mesh lint filter over the drain hose to capture lint, hair, and small objects before they reach the trap.
Always inspect pockets and remove foreign objects from clothing before washing to minimize debris entry.
Avoid overloading your washer and use the correct detergent amount to reduce soap scum and residue, which contribute to clogs.
When you notice slow drainage or foul odors, promptly remove and clean the drain trap or hose to prevent blockages from worsening.
Consistent maintenance with these steps guarantees efficient drainage and extends the lifespan of your washing machine’s plumbing system. It’s really all about staying on top of things so you don’t have bigger problems later.
When Should You Call a Pro?
Regularly cleaning your washing machine’s drain trap helps prevent most clogs, but some issues need a professional touch. You should call a pro when routine maintenance doesn’t fix persistent problems or when technical challenges come up.
Think about getting professional help if drainage issues keep happening despite multiple cleanings. This might mean there’s a deeper blockage or a problem with the pipes.
Also, if you have trouble accessing or removing the drain trap because of rust, corrosion, or tricky fittings that could cause damage, it’s time to call in an expert.
If foul odors or water backups continue after cleaning, or if you see error codes related to drainage on your washer, that’s another sign you should get professional help.
In these situations, a licensed plumber or appliance technician can give you accurate diagnostics and repairs. They’ll make sure your washing machine works well without risking more damage.
Frequently Asked Questions
Can I Use Chemical Cleaners on My Washing Machine Drain Trap?
You shouldn’t use chemical cleaners on your washing machine drain trap unless the manufacturer explicitly allows it. Chemicals can damage seals and plastics, void warranties, and cause buildup.
Instead, go for manual cleaning and regular maintenance. It’s a safer way to keep things running smoothly without risking damage. Plus, it helps you avoid any unexpected repair costs down the line.
Does Cleaning the Drain Trap Affect My Washing Machine’s Warranty?
Cleaning the drain trap won’t void your warranty if you follow the manufacturer’s instructions, use authorized parts, and avoid unauthorized repairs.
Always check your owner’s manual to confirm cleaning is covered under routine maintenance requirements. It’s a good idea to stay informed so you don’t accidentally do anything that could affect your warranty. Just take it step by step, and you should be fine.
How Long Does It Take to Clean a Washing Machine Drain Trap?
Cleaning your washing machine drain trap typically takes 10 to 30 minutes. The exact time depends on clog severity and how easy it is to access the trap.
Getting your tools ready and following the instructions can really help speed things up. It makes the whole process smoother and less time-consuming. So, a little prep goes a long way!
Can a Clogged Drain Trap Cause My Washing Machine to Leak?
Yes, over 60% of washing machine leaks stem from clogged drain traps.
You’ll notice water backing up or leaking near the door seal when blockages increase pressure. Regularly clearing the trap helps prevent damage and keeps the drainage flowing smoothly.
Are There Specific Tools Recommended for Cleaning the Drain Trap?
Yes, you’ll need needle-nose pliers to remove the trap, a small brush or toothbrush to clean debris, and a microfiber cloth to wipe it down.
For tougher clogs, a drain cleaning brush or pipe snake comes in handy. Don’t forget to have a bucket ready to catch any water that might spill out.
These tools make the cleaning process a lot easier and help get the job done right.
Conclusion
Now that you know how to clean your washing machine drain trap, don’t let grime become the silent saboteur of your appliance. Regularly inspecting and clearing the trap keeps water flowing smoothly, preventing costly backups.
Think of it as giving your machine a fresh start. Simple maintenance like this ensures long-term efficiency.
If you’re ever in doubt or clogs just won’t budge, don’t hesitate to call a pro. They can tackle tougher blockages safely and effectively.