How To Clean Dry Erase Marker From Fabric – Easy Removal Tips
To clean dry erase marker from fabric, act quickly by rinsing the stain with cold water to prevent it from setting. Apply rubbing alcohol to break down the ink, then gently blot without spreading. Follow with a soap-based cleaner and rinse thoroughly.
Always air dry to avoid heat fixing the stain, and check carefully for any residue. If you don’t get it all the first time, just repeat the process as needed.
If the stain still won’t budge, getting professional help might be your best bet. There’s actually more to know when it comes to tackling tough or delicate stains effectively.
Act Quickly to Prevent Dry Erase Marker Stains From Setting
Although it’s tempting to delay, you need to act immediately when dry erase marker stains hit your fabric. The ink can set into fabric dye within minutes, making removal much harder if you wait. By responding quickly, you minimize the stain’s penetration, which is essential for effective stain prevention.
If left untreated for hours, body heat and friction cause the ink to bond firmly to fibers, embedding the stain deeper. Acting fast not only preserves the fabric’s original color but also boosts your chances of completely removing the marker ink.
Set Up Your Workspace to Protect Your Fabric
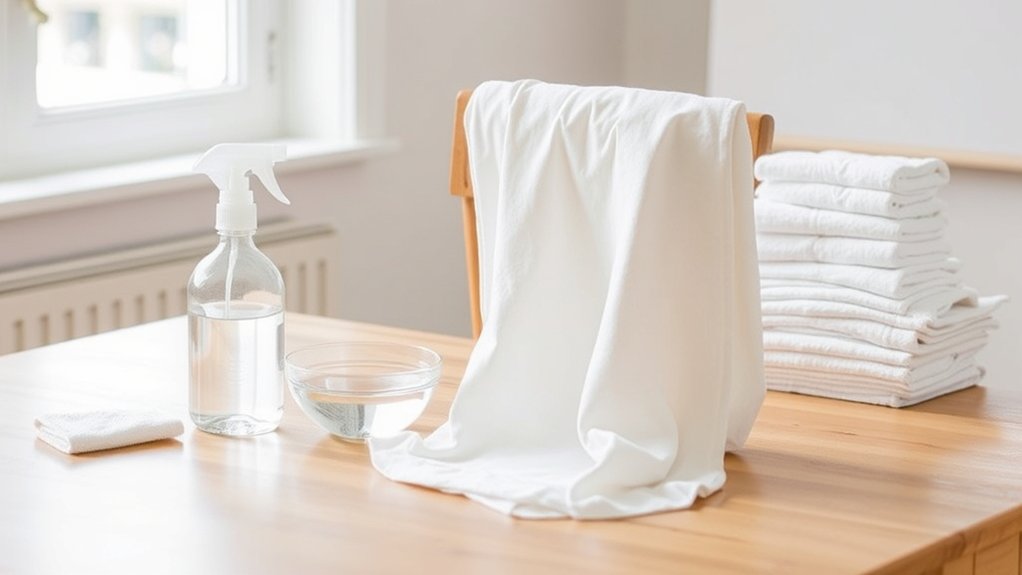
Before you start treating the dry erase marker stain, set up your workspace carefully to protect your fabric and surroundings. Prioritize fabric protection by covering the area around the stain with a clean towel or plastic sheet to prevent ink from spreading.
Prepare your workspace by covering fabric and surroundings to prevent ink spread before treating dry erase marker stains.
Organize your workspace to guarantee all cleaning supplies, like rubbing alcohol, soap, and brushes, are within easy reach, so you won’t need to search mid-cleaning.
Choose a well-lit area to clearly see the stain and track your progress effectively. Also, pick a workspace free from delicate or easily stained items to avoid accidental damage.
Finally, ensure good ventilation, especially if you’ll use chemical solutions, to maintain safety and comfort.
Proper workspace organization sets the foundation for successful stain removal. It really helps make the whole process smoother and less stressful. So take a few extra minutes to get things ready before diving in.
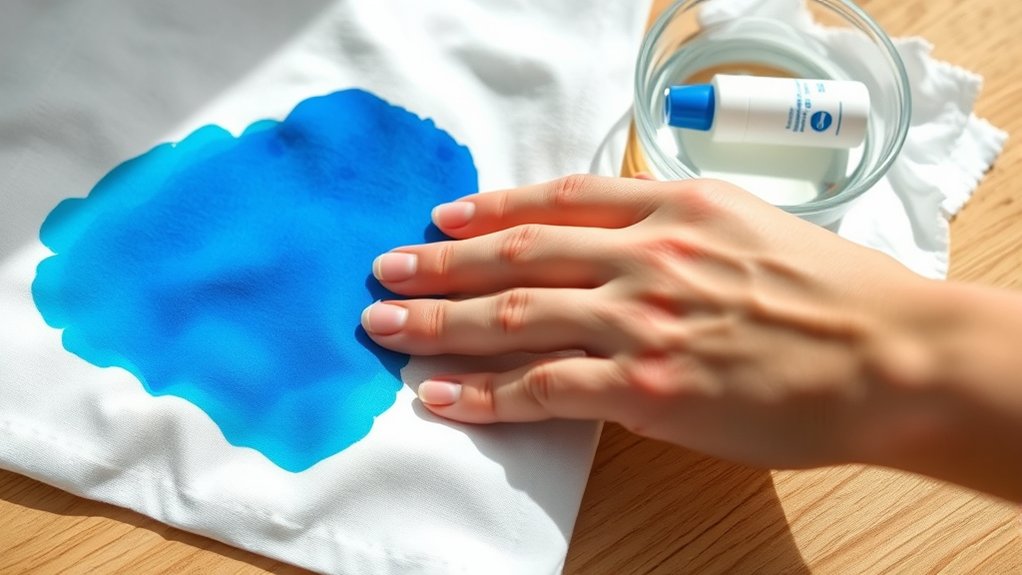
Break Down Marker Ink With Rubbing Alcohol
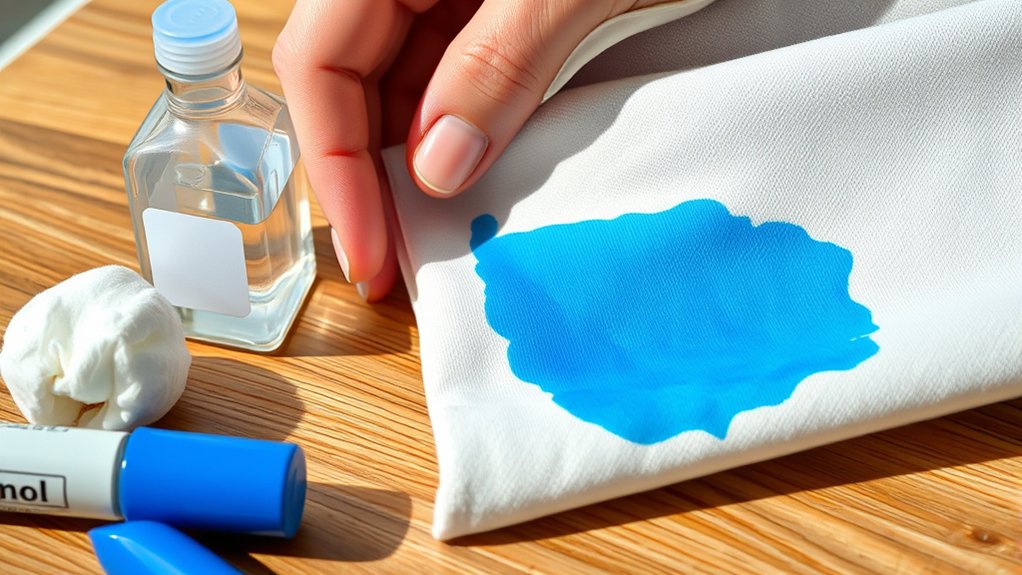
How exactly does rubbing alcohol help remove dry erase marker stains from fabric? Understanding marker chemistry reveals that the solvent in dry erase ink dissolves with alcohol, enhancing solvent effectiveness. When you apply rubbing alcohol to the stain, it breaks down the chemical bonds, making ink easier to lift from fabric fibers.
Follow this quick guide:
| Step | Action | Purpose |
|---|---|---|
| 1 | Apply rubbing alcohol | Dissolves marker ink solvent |
| 2 | Blot gently with cloth | Prevents spreading ink |
| 3 | Let sit for a few minutes | Breaks down chemical bonds |
| 4 | Rinse with cold water | Removes dissolved ink residues |
| 5 | Wash fabric normally | Completes stain removal |
Use rubbing alcohol promptly for best results on fresh stains. It really works best when the stain is still new, so don’t wait too long!
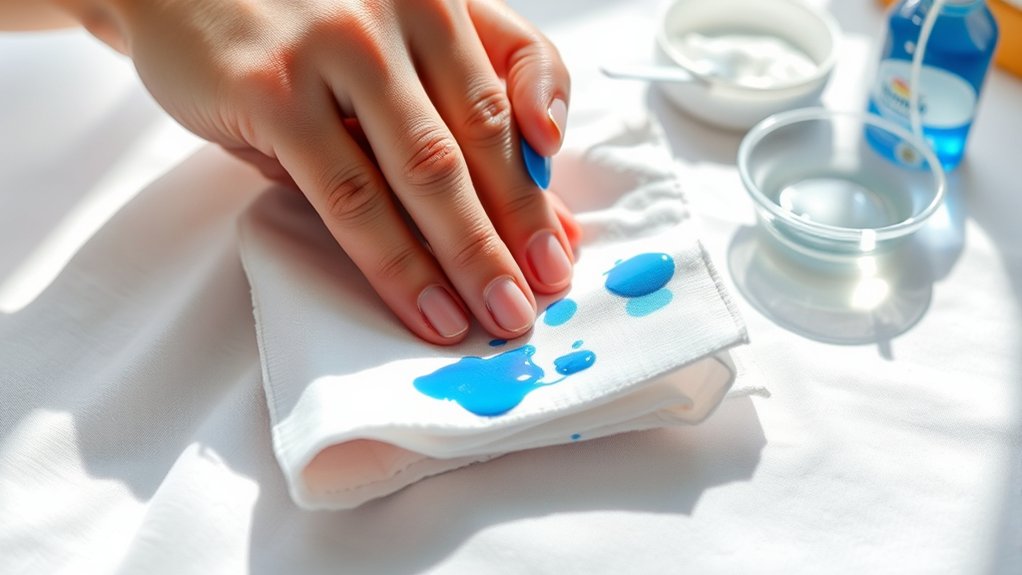
Use Soap-Based Cleaners on Dry Erase Marker Stains
When tackling dry erase marker stains on fabric, using soap-based cleaners like Murphy’s Oil Soap can effectively break down and lift the ink. Just apply the soap directly to the stain and let it soak for several minutes so it can really get into the fabric dyeing deeply.
Next, gently brush the area with a soft toothbrush to loosen the marker residue without damaging the fibers. If the stains don’t come out right away, try working Ivory soap into the fabric with the toothbrush for extra stain-fighting power.
Always test soaps on a hidden spot first to make sure they won’t cause discoloration. After you’re done treating the stain, rinse the fabric thoroughly and then wash it as usual in your washing machine.
This method helps keep your fabric’s color intact while getting rid of that dry erase ink, so it’s great for keeping your clothes looking fresh.
Use Magic Erasers and Specialized Removers Safely
Choose a Magic Eraser that’s just damp enough to lift stains without soaking the fabric.
Before you get started, always test any remover on a hidden area first to make sure it won’t damage the color or fabric.
Then, follow the product instructions carefully when applying stain removers.
And remember, avoid scrubbing too hard—excessive scrubbing can harm the fibers.
Choosing The Right Eraser
Although dry erase marker stains can be stubborn, selecting the right eraser is vital to protect your fabric while effectively removing the mark. When considering eraser types, a dampened Mr. Clean Magic Eraser stands out for its ability to lift stains gently without harsh abrasion.
However, fabric compatibility is key. Avoid abrasive erasers that might fray delicate fibers. Before using specialized stain removers like Motsenbocker’s LIFT OFF, always test them on a hidden fabric area to prevent damage.
Make sure to follow all manufacturer instructions carefully to guarantee safe use. For tougher stains, apply the Magic Eraser with a gentle scrubbing motion. This way, you balance effectiveness with fabric care.
Choosing erasers with these factors in mind helps you clean efficiently while preserving your fabric’s integrity. It’s all about finding the right balance between getting the stain out and keeping your fabric looking great.
Applying Stain Removers
Using the right tools to erase dry erase marker stains sets the foundation, but applying stain removers correctly guarantees a deeper clean without harming your fabric.
Start by gently lifting the stain with a dry Mr. Clean Magic Eraser, then dampen it to enhance effectiveness.
Next, apply a specialized fabric marker stain remover like Motsenbocker’s LIFT OFF. Be sure to carefully follow the manufacturer’s instructions to avoid compromising fabric dyeing or causing discoloration.
Always handle stain removers with care, avoiding harsh chemicals unless properly diluted.
After treatment, thoroughly rinse the fabric to remove residue and check if the stain is fully gone.
This method not only targets existing stains but also supports stain prevention by maintaining your fabric’s original color and integrity.
It’s a simple way to keep your fabric looking fresh and vibrant!
Testing Before Use
How can you be sure that a Magic Eraser or specialized stain remover won’t damage your fabric? Always test on a small, hidden area first to check for adverse effects on fabric dyeing or texture. Slightly dampen the Magic Eraser and gently rub the inconspicuous spot, then let it dry completely before inspecting for discoloration or deterioration.
For specialized removers like Motsenbocker’s LIFT OFF, carefully follow the manufacturer’s instructions and perform a patch test using a small amount. Testing with rubbing alcohol or similar solutions beforehand also helps identify potential damage.
This step is crucial for effective stain prevention, ensuring your fabric remains intact and vibrant while safely removing dry erase marker stains.
Never skip this test. It protects your fabric and guarantees the best cleaning results.
Rinse Thoroughly With Cold Water to Flush Out Ink
When you spot dry erase marker ink on fabric, immediately rinsing it with cold water can prevent the stain from setting deeper. Different fabric types respond best when you use a gentle stream of cold water to flush out the ink.
This helps dilute and loosen the marker’s pigments trapped within the fibers.
Avoid hot water, as it can cause the ink to bond permanently, making removal harder. Thoroughly rinse the stained area under cold water, ensuring you flush as much ink as possible without damaging the fabric.
Repeated rinsing can remove residual ink before you proceed with further treatments.
Prompt action and proper rinsing with cold water are essential to successfully removing dry erase marker stains from various fabric types.
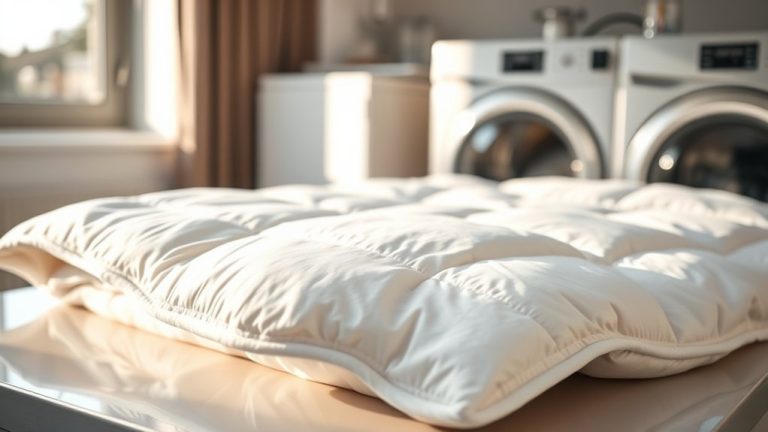
Wash and Air Dry While Checking Dry Erase Stains
After thoroughly rinsing the fabric with cold water to flush out as much dry erase marker ink as possible, the next step is to wash the garment in cold water. This helps remove residual stains without setting the ink deeper into the fabric texture.
Once washed, air dry the fabric instead of using a dryer. Heat can permanently set any remaining stain, which reduces stain visibility and makes removal harder.
When the fabric is dry, inspect it carefully under good lighting. Pay close attention to the fabric texture and any lingering discoloration to see if the stain has been fully eliminated.
If you spot traces of the marker, just repeat the cleaning process before applying heat. This way, you preserve the fabric quality and make sure you get the best results in stain removal.
Repeat Treatment or Seek Professional Help for Tough Stains
If the stain is still there after the fabric dries, go ahead and repeat your cleaning steps carefully. This can really help improve your chances of getting the stain out.
Just make sure the fabric is completely dry before each new treatment so you can see how well it’s working.
And if those stubborn stains just won’t come out, don’t be afraid to call in the pros. Professional cleaning can protect your fabric and give you the best shot at a really effective clean.
When To Repeat
Although you may have treated the dry erase marker stain once, you should repeat the cleaning process if any traces remain after washing. Always inspect the fabric under good lighting before drying to avoid setting the stain permanently.
For colorfast fabrics, repeating the treatment carefully helps with stain prevention and preserves fabric quality.
If the stain persists after multiple attempts, especially on delicate or valuable items, it’s time to reconsider your approach. Avoid drying until you’re confident the mark is fully removed.
Repeating the cleaning ensures you don’t miss any residue that could become permanent.
However, persistent stains that resist repeated efforts may require professional attention or specialized removers to protect your fabric and maintain its appearance.
Professional Cleaning Options
When repeated home treatments fail to completely remove a dry erase marker stain, exploring professional cleaning options can save your fabric from permanent damage. Professionals use industrial-grade solvents and advanced techniques that improve stain prevention and protect your fabric’s original color. This helps reduce the risk of fabric dyeing issues.
If the stain is large, deeply embedded, or on delicate fabric, seeking expert help is your safest bet. They’ve access to specialized stain removal agents and can try multiple treatment attempts for stubborn stains.
Plus, they know how to handle delicate fabrics without causing damage. This means they can effectively prevent fabric dyeing or discoloration.
Turning to pros ensures thorough stain removal while maintaining your fabric’s integrity and appearance. It’s often worth it to get the best results with less risk.
Frequently Asked Questions
Can Dry Erase Marker Stains Cause Permanent Fabric Damage?
Yes, dry erase marker stains can cause permanent fabric damage due to fabric sensitivity. If you don’t act quickly, the stain permanence increases as the ink sets, making removal difficult and potentially harming the fabric fibers.
Is It Safe to Use Rubbing Alcohol on All Fabric Types?
You shouldn’t use rubbing alcohol on all fabrics; over 30% of delicate materials like silk risk damage from chemical reactions.
Always test fabric safety first to avoid discoloration or fiber weakening when cleaning dry erase marker stains.
It’s better to be safe than sorry, right? A quick test can save your favorite clothes from getting ruined.
How Long Should I Wait Before Washing Treated Fabric?
You should wait at least 24 hours before washing treated fabric, no matter what type of fabric it is.
This gives the stain remover enough time to fully do its job. Try not to wash the fabric too often, as this can cause damage.
Plus, letting the treatment sit helps the stain come out better before you wash it again.
Can Dry Erase Marker Ink Transfer During Washing?
Yes, marker transfer can happen during washing if the dry erase ink isn’t fully removed. This can cause fabric discoloration on other clothes. So, you’ve got to pre-treat stains thoroughly before tossing fabrics in the wash.
Make sure you give those stains some real attention. Otherwise, you might end up with unwanted marks on your other laundry. It’s all about catching it early!
Are There Natural Alternatives to Rubbing Alcohol for Stain Removal?
You don’t need a chemistry degree to conquer stains! Natural remedies like vinegar, baking soda, lemon juice, and hydrogen peroxide offer powerful stain removal.
These options let you tackle ink marks safely without harsh rubbing alcohol or chemicals.
Conclusion
Don’t let dry erase marker stains turn your favorite fabric into a lost cause. Act fast and follow each step carefully. You’ll watch the ink disappear like magic.
Remember, patience and persistence are your best allies. Sometimes stains need a second chance to vanish completely.
With these tips, you’re not just cleaning; you’re reclaiming your fabric’s fresh start. So, roll up your sleeves and tackle those stains confidently. You’ve got this!